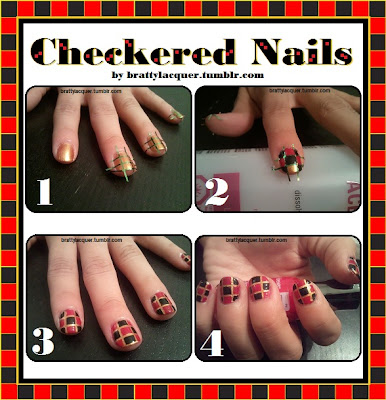
To achieve this look, paint your nails 1 coat of your choice of color and wait for it to dry. Apply strips of striping tape to create a checkerboard design. Color in the boxes and remove the tape before the polish dries (You'll need to do this one nail at a time). Repeat this process until your Checkered Mani is complete. Apply a fast drying top coat and stare at your beautiful creation!
:)

Really cool! 2 questions by the way :)
ReplyDelete1. Does any tape work, or do you need ta use some special tape?
2. Why do you have to remove the tape before the polish dries?
Thank you :D
Hi Estelle,
DeleteI used striping tape because it's already the size that you need it to be for this design. That way you can be sure all the lines will look the same.
You'll need to remove the tape before the polish dries so it doesn't crack or peel off and mess up your design. This process will take longer, doing one nail at a time, but everything will be neat and precise.
Hope this helps :)